There’s something undeniably magical about the aroma of fresh pizza dough baking in the oven.
This Quick and Simple Pizza Dough Recipe offers a delightful blend of crispy crust and chewy texture that everyone loves.
I remember the first time I made pizza from scratch with my family, and it quickly became a cherished weekend ritual.
Perfect for casual gatherings or a cozy night in, this dough comes together in no time and sets the stage for your favorite toppings.
The History and Cultural Significance
• Pizza dough traces its origins to Naples, Italy, where it was originally created by bakers in the 18th century.
• The dish evolved over decades as various toppings and styles emerged, eventually becoming the beloved version we know today.
• In Italy, pizza is traditionally enjoyed during family gatherings and celebrations, symbolizing unity and joy.
• While many variations exist across different regions, the authentic Neapolitan pizza maintains a soft, airy crust that sets it apart from imitations.
Recipe Overview
Nutritional Information (per serving)


Ingredients


Essential Equipment Guide
Mixing Bowl: A sturdy mixing bowl is essential for combining ingredients effectively. Look for one that is large enough to accommodate the dough as it rises and sturdy enough to withstand vigorous mixing.
Rolling Pin: This tool is crucial for achieving the perfect dough thickness. A wooden rolling pin is often preferred for its weight and control, but silicone options can also work well.
Pizza Stone or Baking Sheet: A pizza stone helps achieve a crispy crust by evenly distributing heat. If you don’t have one, a heavy baking sheet turned upside down can also do the trick.
Preparation Methods
Proofing Yeast: Proofing is the process of activating the yeast to ensure it’s alive and ready to work. Combine warm water, sugar, and yeast, and let it sit for 5-10 minutes until foamy. This step is crucial for a light and airy crust.
Kneading Dough: Kneading develops gluten, which gives the dough its structure and chewiness. Gently fold and push the dough with your palms for about 5-7 minutes until smooth and elastic. This technique is key to achieving the perfect texture.
Resting Dough: Allowing the dough to rest is essential for flavor development and easier stretching. Cover the dough with a damp cloth and let it sit for about 30 minutes. This step ensures the dough is relaxed and easy to roll out.
Step 1: Prepare Ingredients
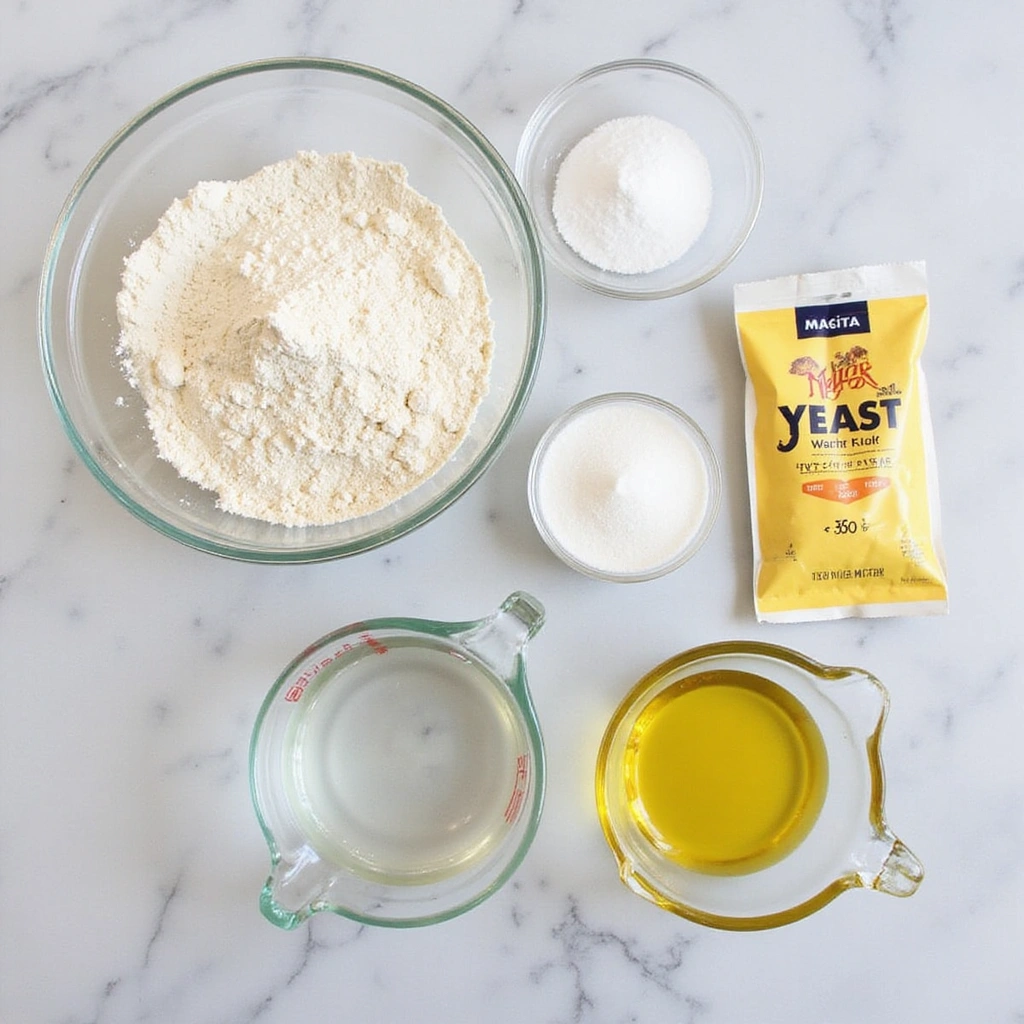
Gather all your ingredients on a clean countertop.
Make sure the water is warm, not hot, to activate the yeast without killing it.
Measure out the flour, salt, sugar, yeast, and olive oil accurately.
Having everything prepared will streamline the process and make it enjoyable.


Step 2: Mix Dry Ingredients
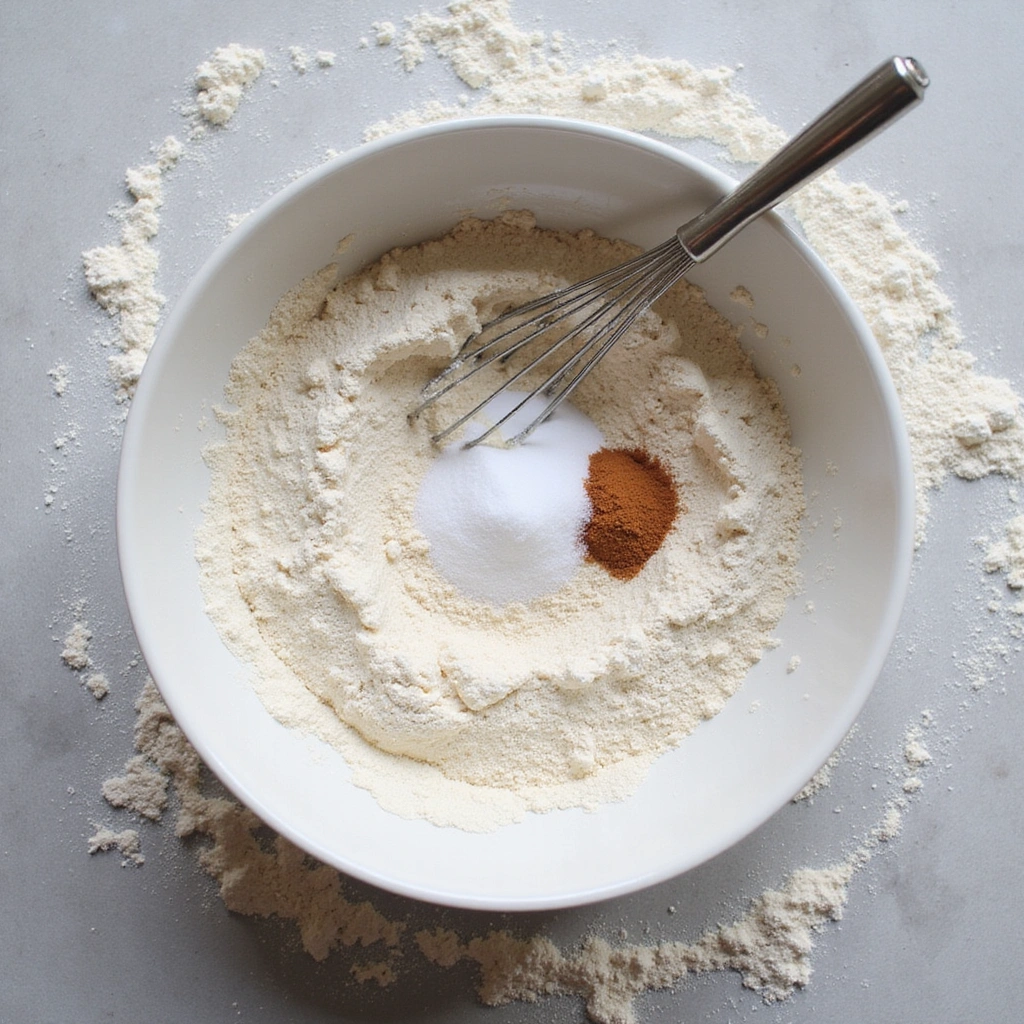
In a large mixing bowl, combine the flour, salt, and sugar thoroughly.
Make a well in the center to pour in the yeast mixture later.
This ensures even distribution of the dry ingredients for a consistent dough.
Use a whisk to mix the dry ingredients well before adding wet components.


Step 3: Activate Yeast
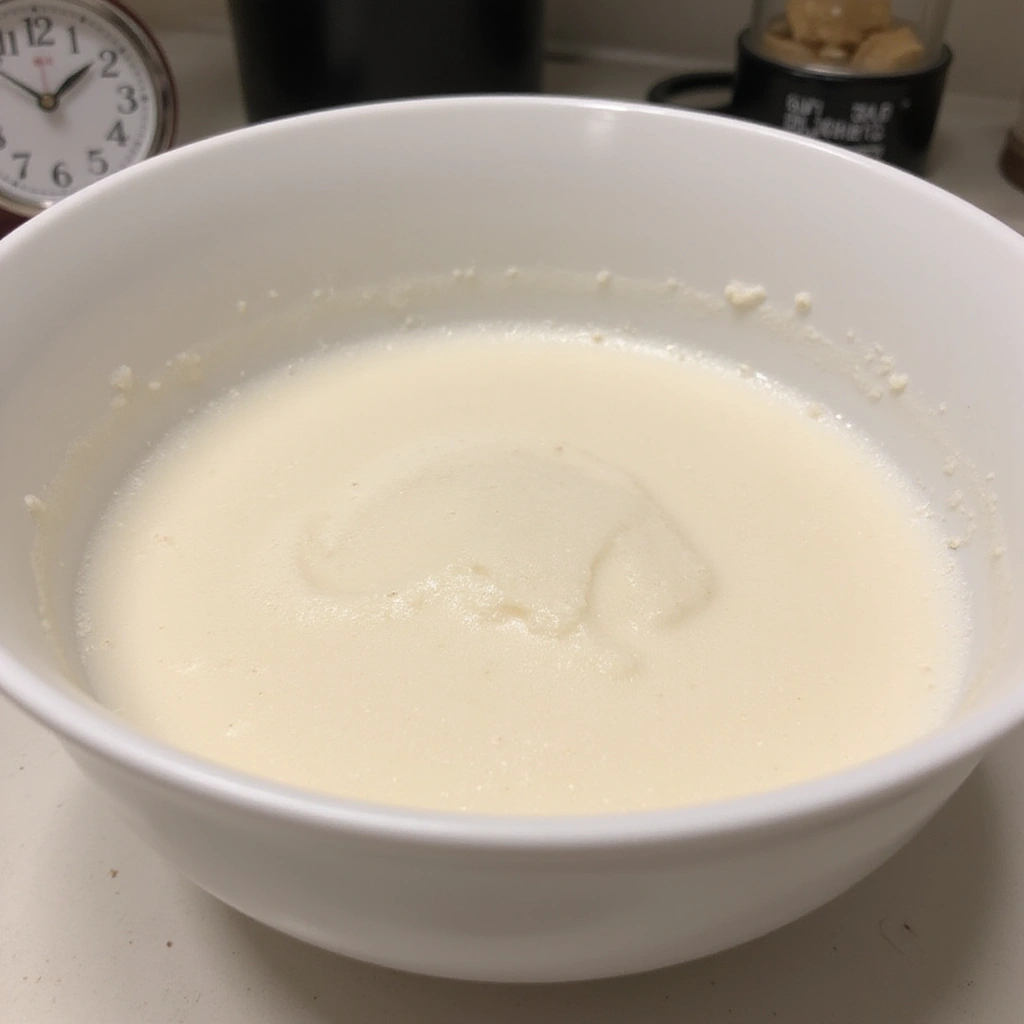
In a separate bowl, combine warm water and yeast, stirring gently.
Let it sit for about 5-10 minutes until it becomes frothy.
This indicates that the yeast is active and ready to use.
Be careful not to use water that is too hot, which can kill off the yeast.
Step 4: Combine Ingredients
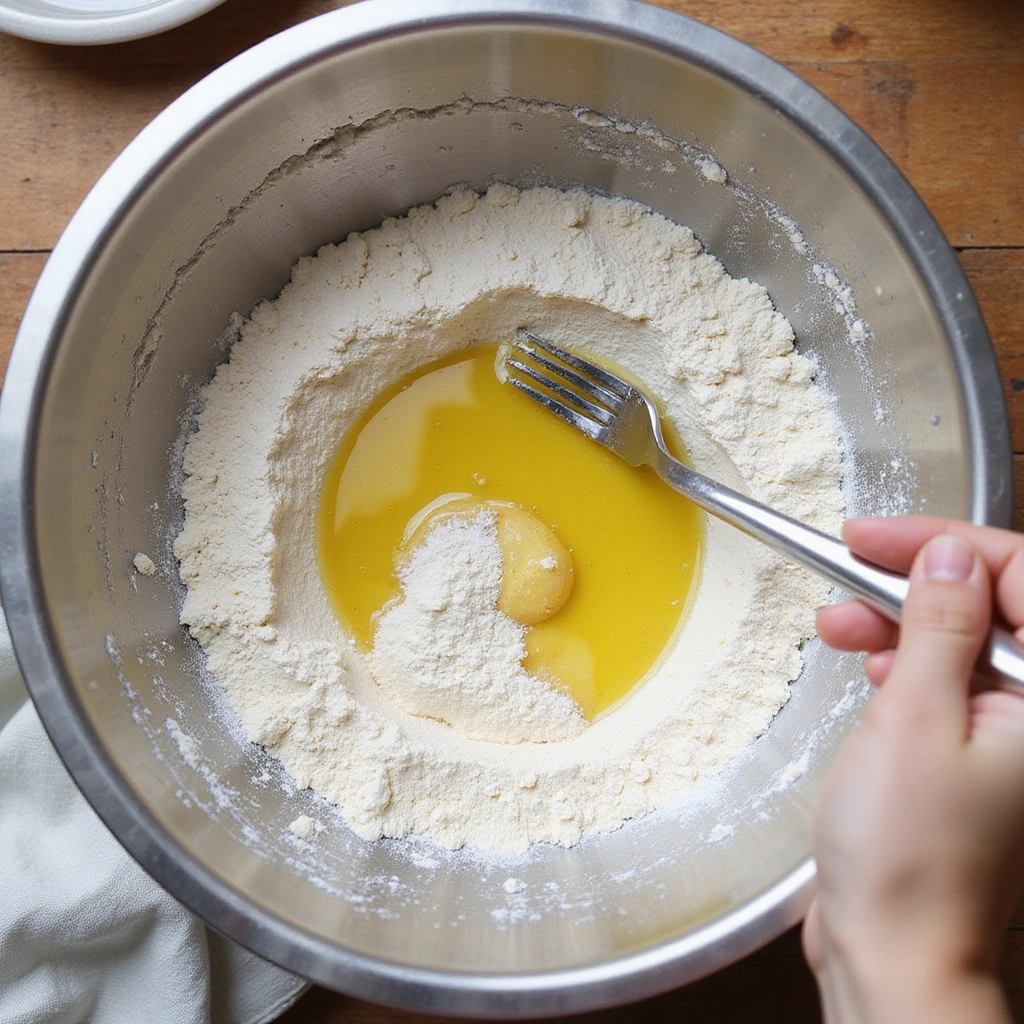
Pour the frothy yeast mixture into the well of the flour mixture.
Add the olive oil to the bowl as well for added flavor.
Use a fork or your hands to combine until a shaggy dough forms.
This initial mixing is crucial to ensure all dry ingredients are hydrated.
Step 5: Knead the Dough
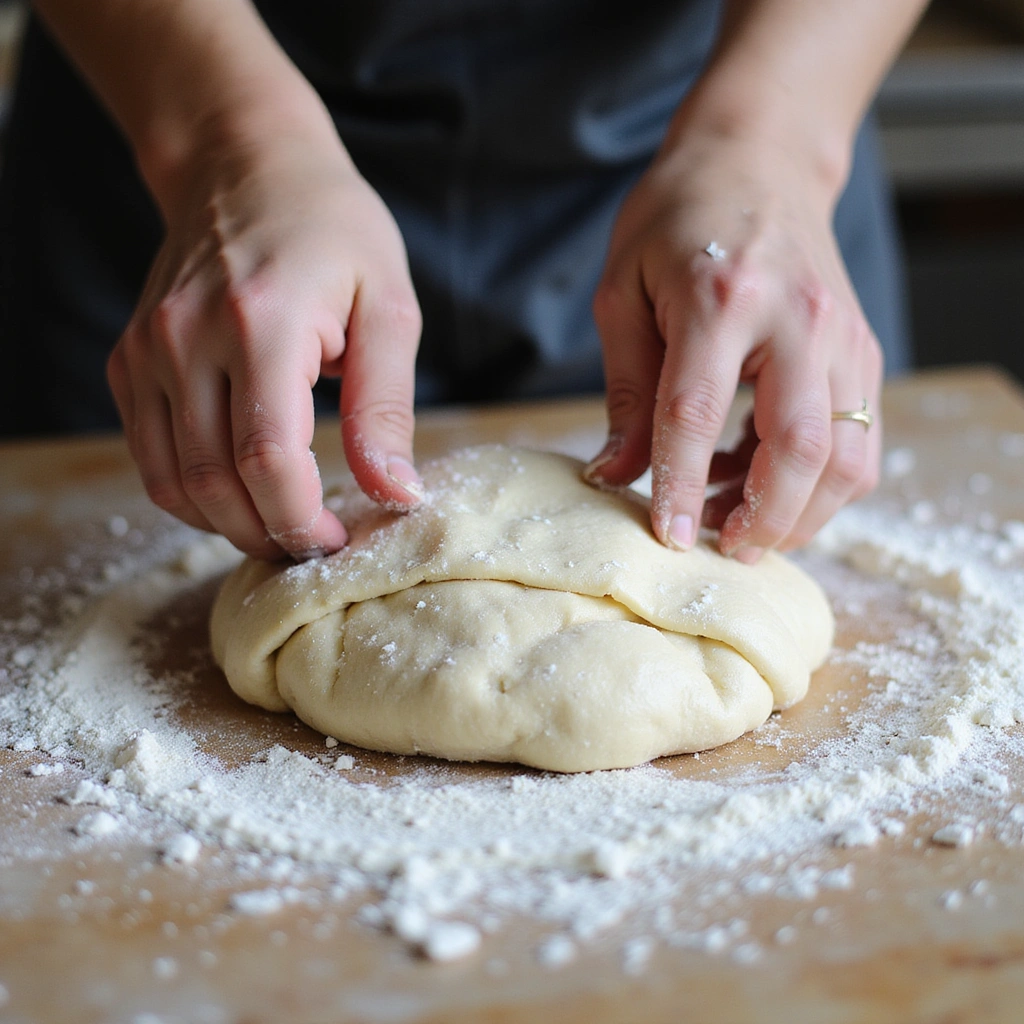
Transfer the shaggy dough onto a floured surface.
Knead the dough by folding it over itself and pushing it down with your palm.
Continue for about 5-7 minutes until it becomes smooth and elastic.
This process develops the gluten necessary for a chewy crust.
Step 6: Let the Dough Rise
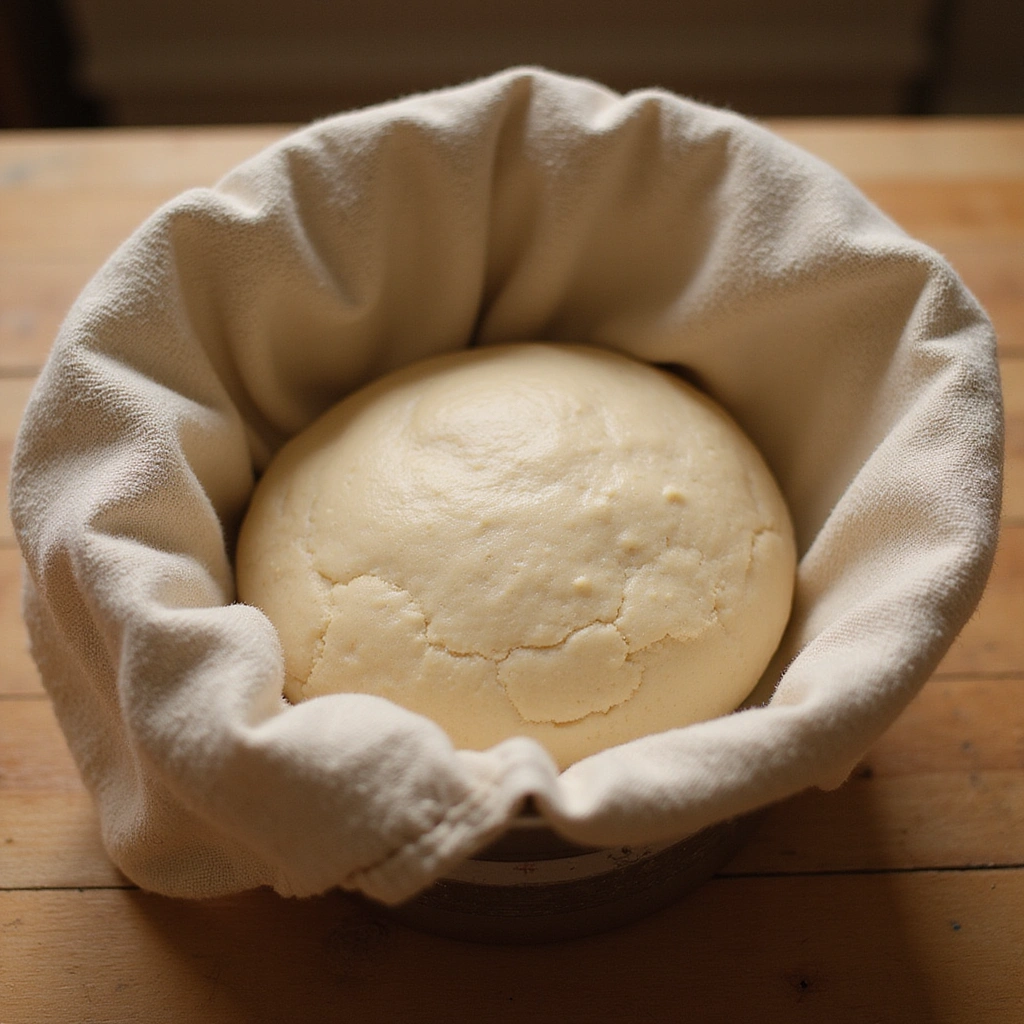
Shape the kneaded dough into a ball and place it in a lightly oiled bowl.
Cover the bowl with a damp cloth to retain moisture.
Let the dough rise in a warm place for about 30 minutes, or until it doubles in size.
This resting period is essential for developing flavor and texture.
Step 7: Preheat the Oven
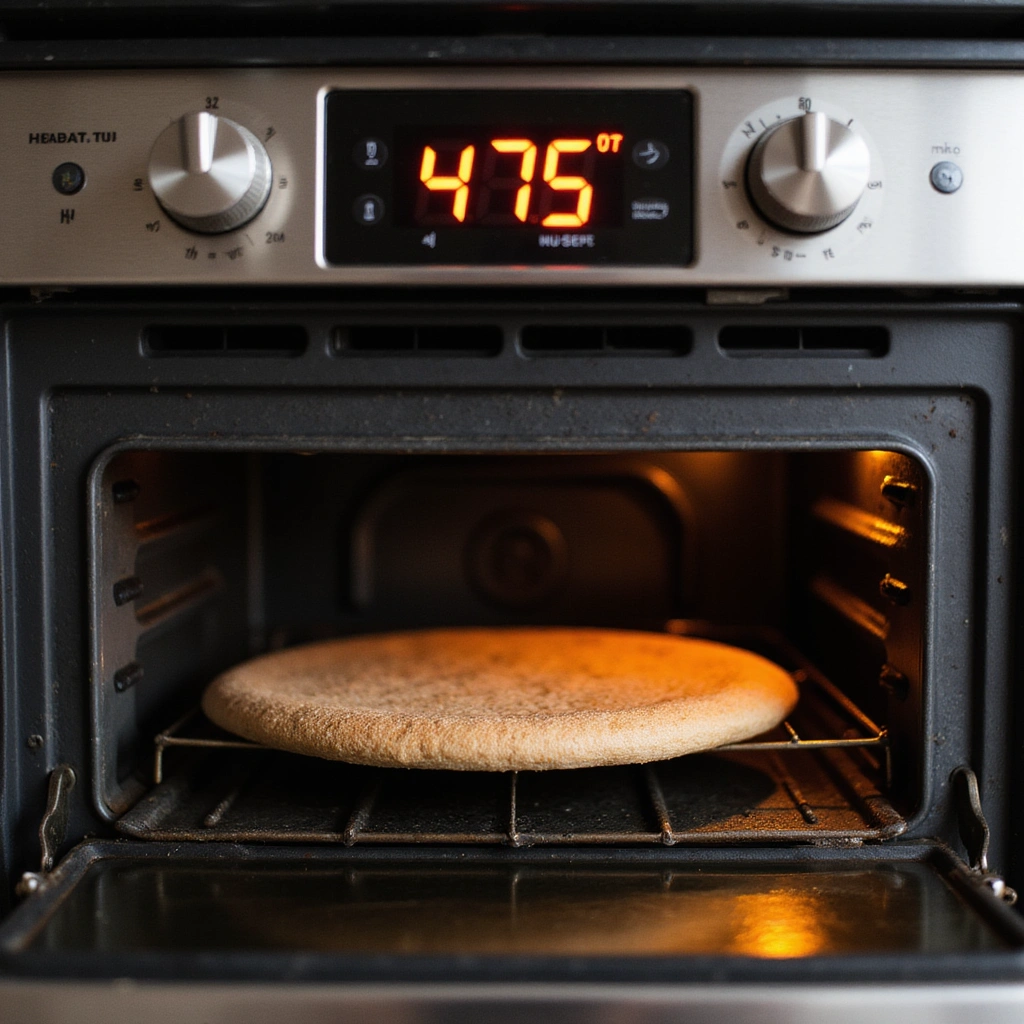
While the dough is rising, preheat your oven to 475°F (245°C).
If using a pizza stone, place it in the oven while it heats up.
This high temperature is key for achieving a crispy crust.
Make sure the oven is fully preheated before baking the pizza.


Step 8: Shape the Dough
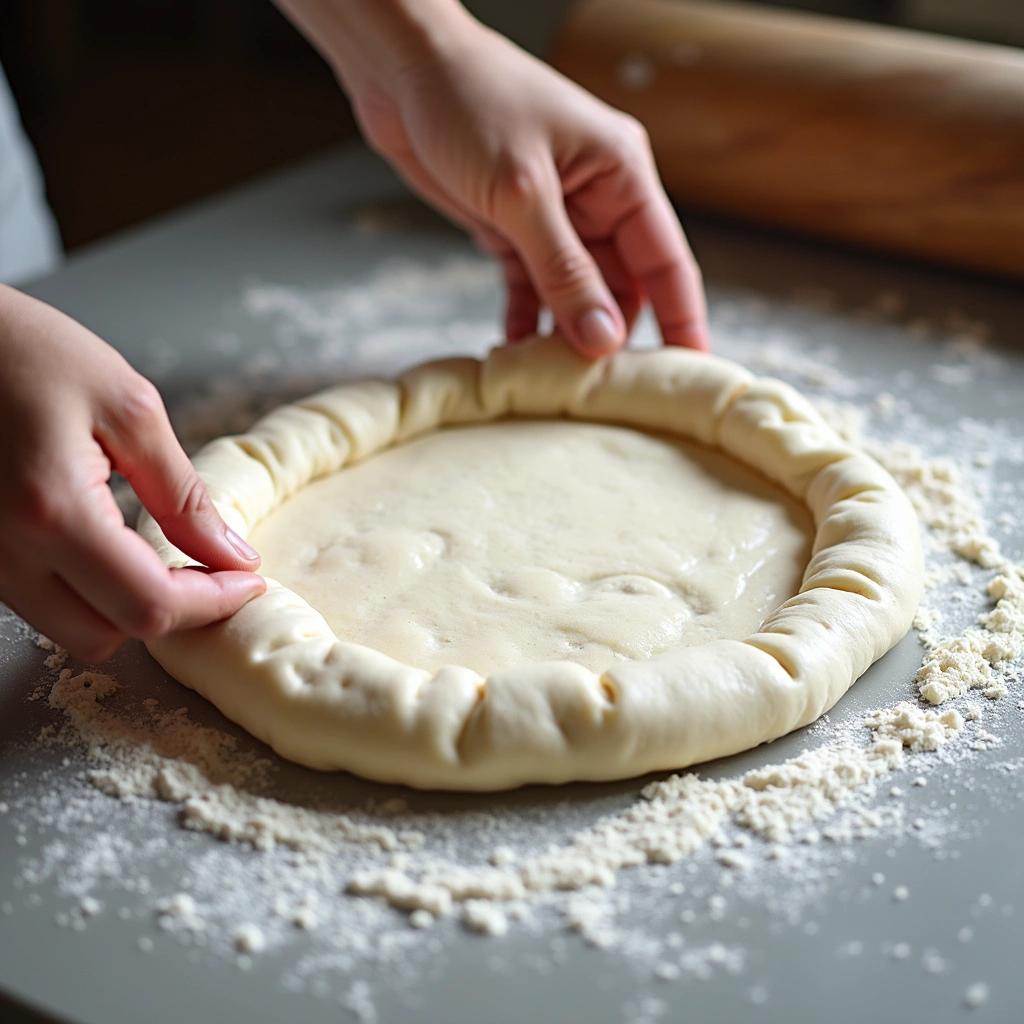
Once the dough has risen, punch it down to release air bubbles.
Transfer it to a floured surface and divide it in half for two pizzas.
Using your hands or a rolling pin, stretch each portion into a round shape.
Aim for an even thickness for consistent cooking.
Step 9: Add Toppings

Transfer the shaped dough onto a floured baking sheet or hot pizza stone.
Add your favorite sauce, cheese, and toppings evenly over the surface.
Be mindful not to overload the pizza, as it can affect cooking times.
This is where your creativity can shine through!
Step 10: Bake the Pizza
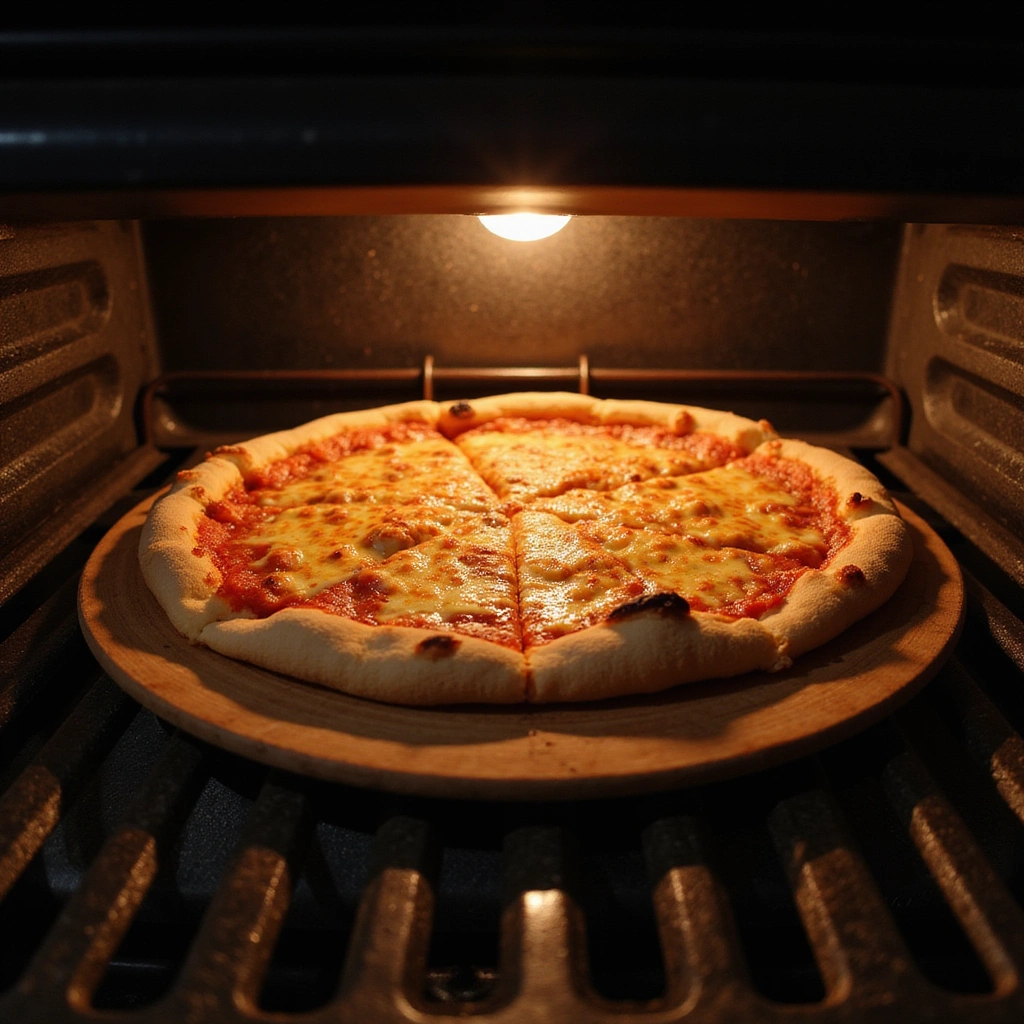
Place the pizza in the preheated oven and bake for 12-15 minutes.
Keep an eye on it to avoid burning, looking for a golden-brown crust.
The cheese should be bubbly and slightly browned when it’s ready.
Rotate the pizza halfway through for even cooking.
Step 11: Let it Cool
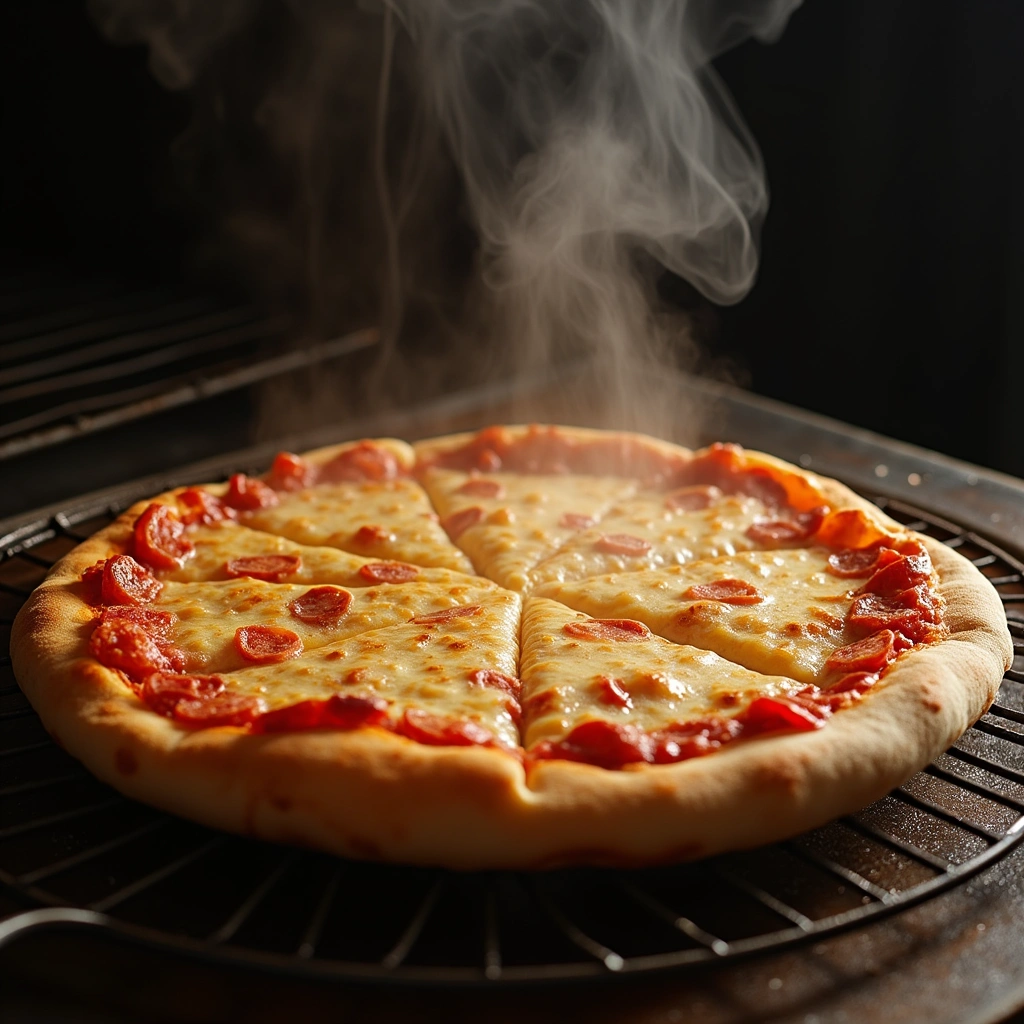
Once baked, carefully remove the pizza from the oven.
Allow it to cool for a few minutes on a wire rack.
This prevents the crust from becoming soggy and allows for easier slicing.
Patience here pays off with the perfect slice!
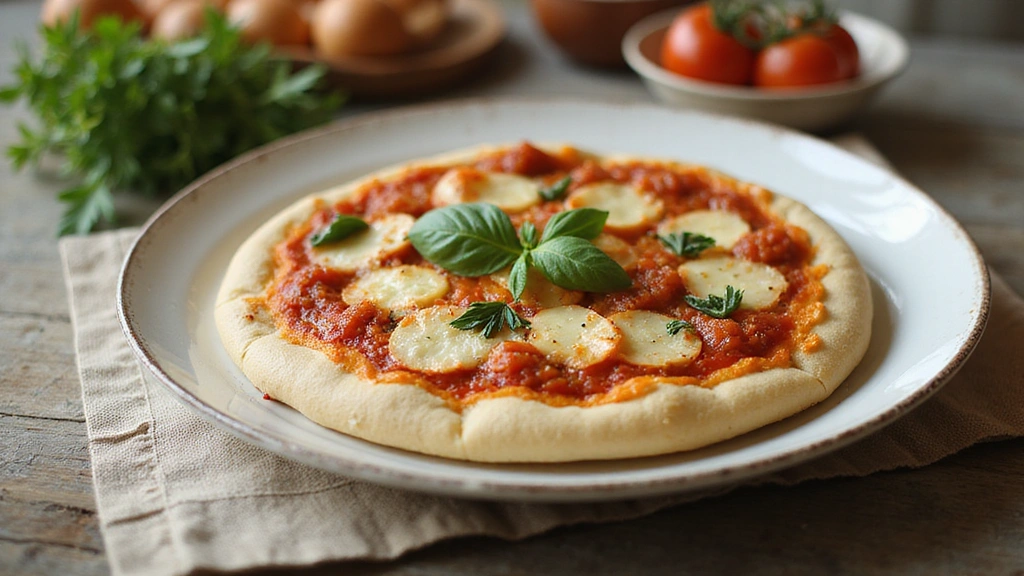
Step 12: Slice and Serve
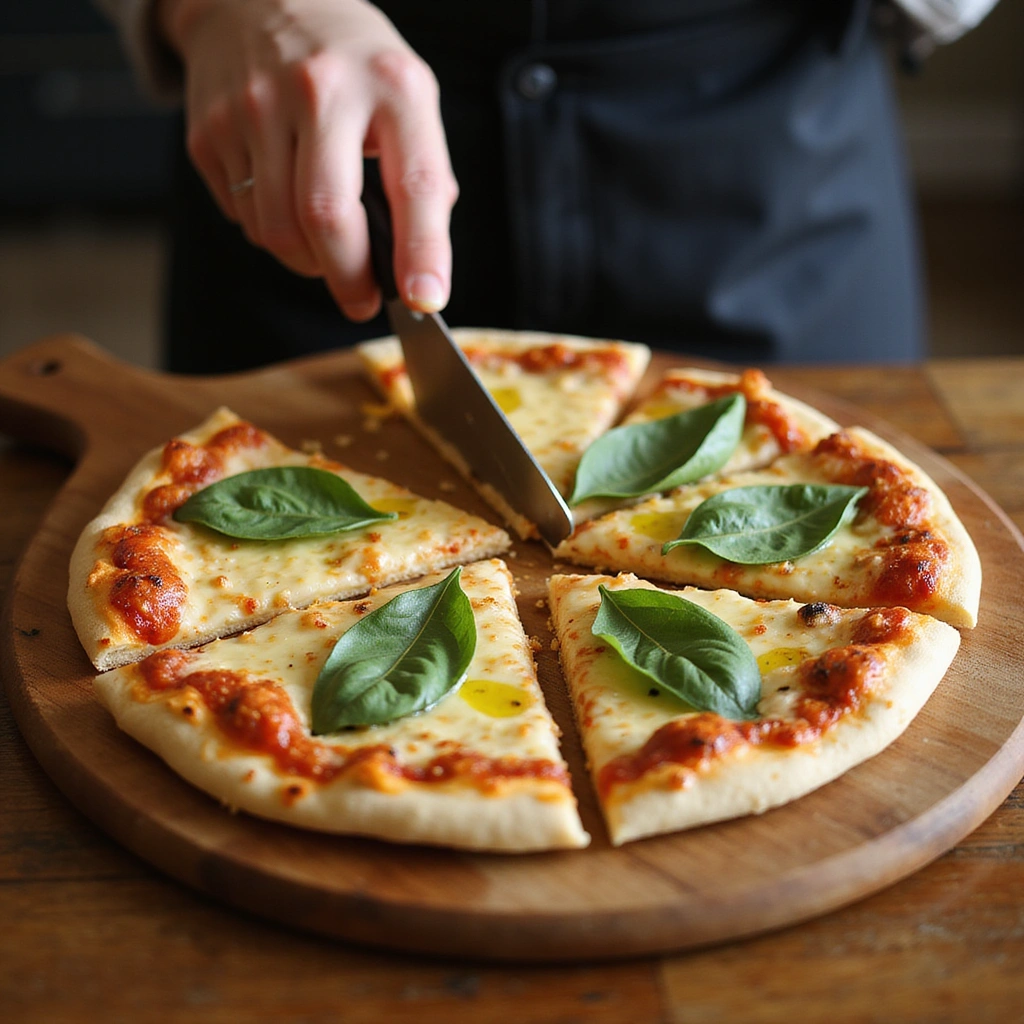
Using a pizza cutter, slice the pizza into even wedges.
Serve hot, garnished with fresh basil or a drizzle of olive oil if desired.
Enjoy the fruits of your labor with family or friends.
This is where everyone gathers to savor the deliciousness!


Critical Timing and Temperature Guide
Rising Dough: Allow the dough to rise for at least 30 minutes in a warm spot until it doubles in size. Look for a puffy, pillowy texture. Avoid letting it rise too long, which can cause over-proofing and a dense crust.
Baking Pizza: Bake the pizza at 475°F (245°C) for 12-15 minutes. The crust should be golden brown, and the cheese bubbly. Do not open the oven frequently as this can affect heat retention.
Cooling Period: Let the pizza cool for at least 5 minutes before slicing. This allows the cheese to set slightly, making it easier to cut. Slicing too early can lead to messy pieces and toppings sliding off.
Pro Tips for Quick and Simple Pizza Dough
• Ingredient Selection: Use high-quality flour, preferably bread flour, for a chewier texture. Fresh yeast also contributes to better rise and flavor.
• Preparation Secret: Letting the dough rest longer than 30 minutes can improve flavor and texture. If you have time, consider a longer rise in the refrigerator overnight.
• Temperature Management: Ensure your water temperature is just right—between 100°F to 110°F—so the yeast activates effectively without being killed.
• Texture Enhancement: For a bubbly crust, use a pizza stone or baking steel preheated for at least 30 minutes before baking.
• Flavor Layering: Consider adding herbs to the dough for extra flavor, such as dried oregano or garlic powder.
• Make-Ahead Strategies: You can prepare the dough in advance and refrigerate it for up to 24 hours. Just let it come to room temperature before shaping and baking.
• Restaurant-Quality Finishing Touches: Finish with a sprinkle of sea salt and fresh herbs just before serving for added flavor and visual appeal.
• Equipment Optimization: A pizza peel can help transfer the pizza to the oven easily and is worth the investment for regular pizza makers.
Troubleshooting Common Issues
• Dough Not Rising: This can occur if the yeast is dead or the water was too hot. Always proof your yeast first and use warm water between 100°F and 110°F.
• Crust Too Hard: Over-kneading can lead to a tough texture. Knead just until smooth and elastic to avoid this issue.
• Burnt Toppings: If toppings burn but the crust is undercooked, consider adding them halfway through the baking process. This allows for even cooking without burning.
• Soggy Crust: Ensure your oven is hot enough and avoid adding too many wet toppings. Using a preheated pizza stone helps combat this.
• Flavorless Dough: Always season your dough with salt, and consider adding herbs for extra flavor. This step is crucial for an enjoyable pizza experience.
Variations and Regional Differences
• Neapolitan Pizza: This classic style features a thin, soft crust with minimal toppings, often only tomato sauce, mozzarella, and fresh basil. The dough is typically allowed to rise for a longer period for deeper flavor.
• New York-Style Pizza: Known for its large, foldable slices, this version has a thicker, chewier crust. It often includes a more substantial layer of cheese and is cooked at a lower temperature for a longer period.
• Chicago Deep-Dish Pizza: This variation uses a buttery crust and is baked in a deep pan, resulting in a thick pie filled with layers of cheese, meats, and sauce on top. The dough is more akin to a biscuit texture.
• Modern Interpretations: Creative toppings like BBQ chicken, vegan cheese, or gluten-free crusts reflect current culinary trends while maintaining the essence of pizza.


Food Science Behind the Recipe
• Yeast Fermentation: Yeast ferments the sugars in the dough, producing carbon dioxide that causes the dough to rise. Understanding this process allows you to troubleshoot rising issues.
• Gluten Development: Kneading the dough helps develop gluten, which gives structure and chewiness. The more you knead, the stronger the gluten network, impacting the final texture.
• Browning Reaction: The Maillard reaction occurs during baking, giving the crust its golden color and complex flavors. This reaction is enhanced by high temperatures, making it vital to preheat your oven.
Frequently Asked Questions
What’s the most common mistake people make when preparing pizza dough? Many forget to proof the yeast, which is essential for a good rise. Always check that your yeast is active before proceeding.
Can I prepare components of this dish in advance? Yes, you can prepare the dough and refrigerate it for up to 24 hours. Just let it sit at room temperature for 30 minutes before shaping.
How do I adapt this recipe for dietary restrictions? Substitute all-purpose flour with gluten-free flour blend and use a gluten-free yeast if necessary.
What’s the best way to store and reheat leftovers? Store in an airtight container in the fridge for 3-4 days. Reheat in a preheated oven at 350°F (175°C) for about 10 minutes for best results.
Can I freeze this dish? Yes, you can freeze the dough before it rises. Wrap it tightly and freeze for up to 3 months. Thaw in the fridge before use.
What wine or beverages pair best with this dish? Light-bodied red wines, like Chianti or Pinot Noir, complement the pizza well, balancing the acidity of the tomato sauce.
How can I scale this recipe up for a crowd? Simply multiply the ingredients by the number of pizzas you wish to make, keeping in mind that baking times may need adjustment.
What side dishes complement this recipe best? A simple arugula salad with lemon vinaigrette pairs wonderfully, offering a fresh contrast to the rich pizza.
How do professional chefs elevate this dish for restaurant service? Chefs often use high-quality ingredients, artisanal cheeses, and fresh herbs, plus they might add extra steps like a finishing drizzle of olive oil or balsamic reduction.
Serving and Presentation Guide
• Traditional Presentation: Serve pizza hot from the oven on a wooden pizza board, garnished with fresh basil or a sprinkle of Parmesan cheese. This method emphasizes freshness and simplicity.
• Modern Plating Ideas: Consider cutting the pizza into unique shapes or serving it with a side of dipping sauces for a contemporary twist. This approach adds flair and personalization.
• Accompaniment Suggestions: Serve with a refreshing salad, such as a Caprese salad, to balance the richness of the pizza.
• Special Occasion Presentation: For celebrations, create a pizza bar with a variety of unique toppings and sauces, allowing guests to customize their own pizzas.
Conclusion
I hope this Quick and Simple Pizza Dough Recipe inspires you to create delicious homemade pizzas.
There’s a unique joy in preparing food from scratch, and pizza is a wonderful canvas for creativity.
Don’t hesitate to experiment with toppings and flavors that excite you.
Happy cooking and enjoy your pizza night!