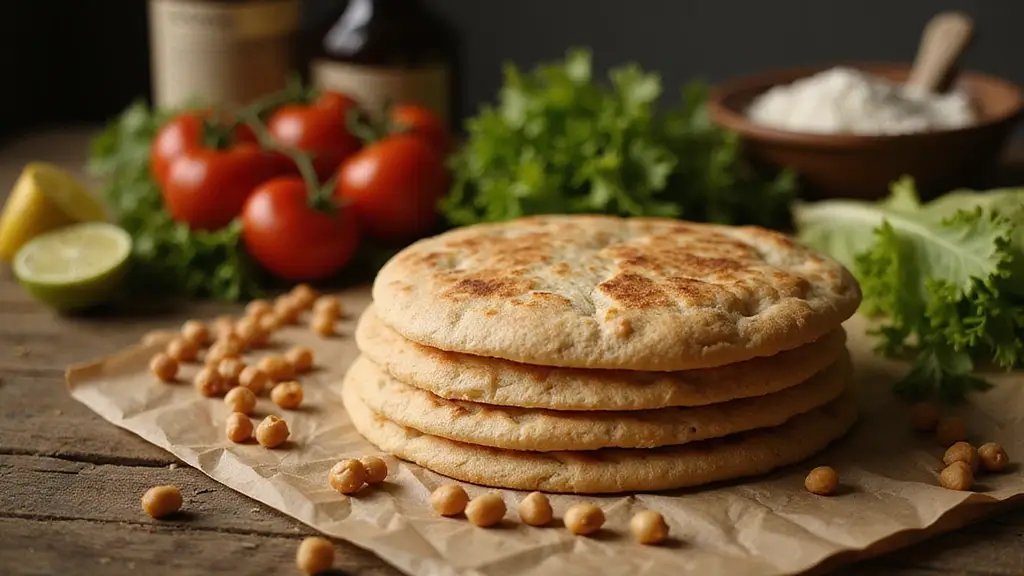
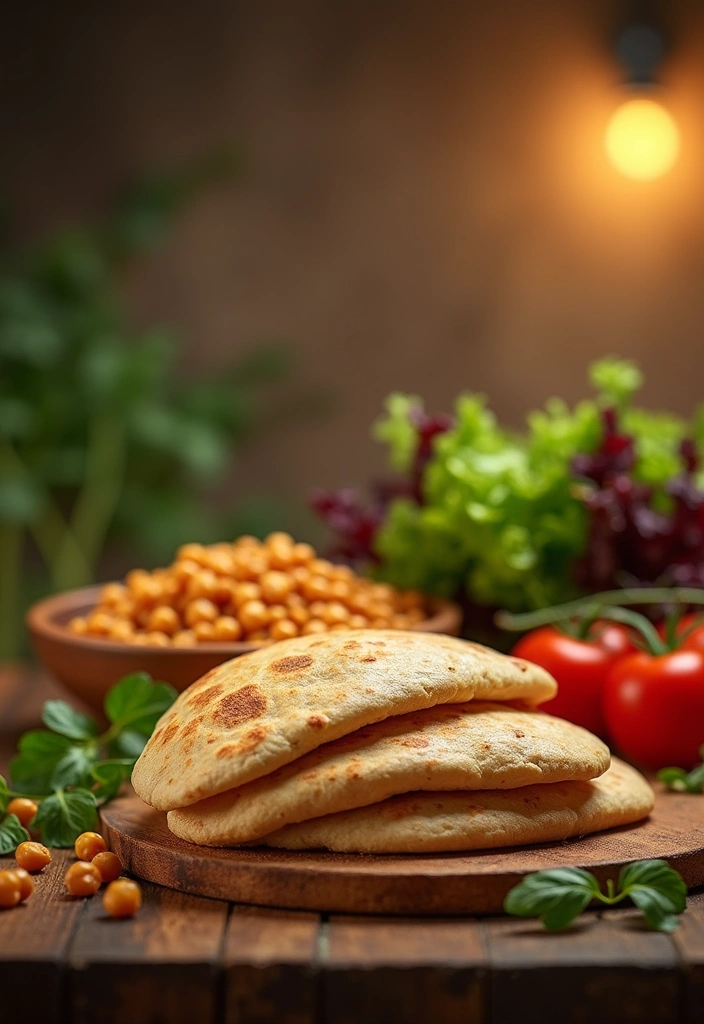
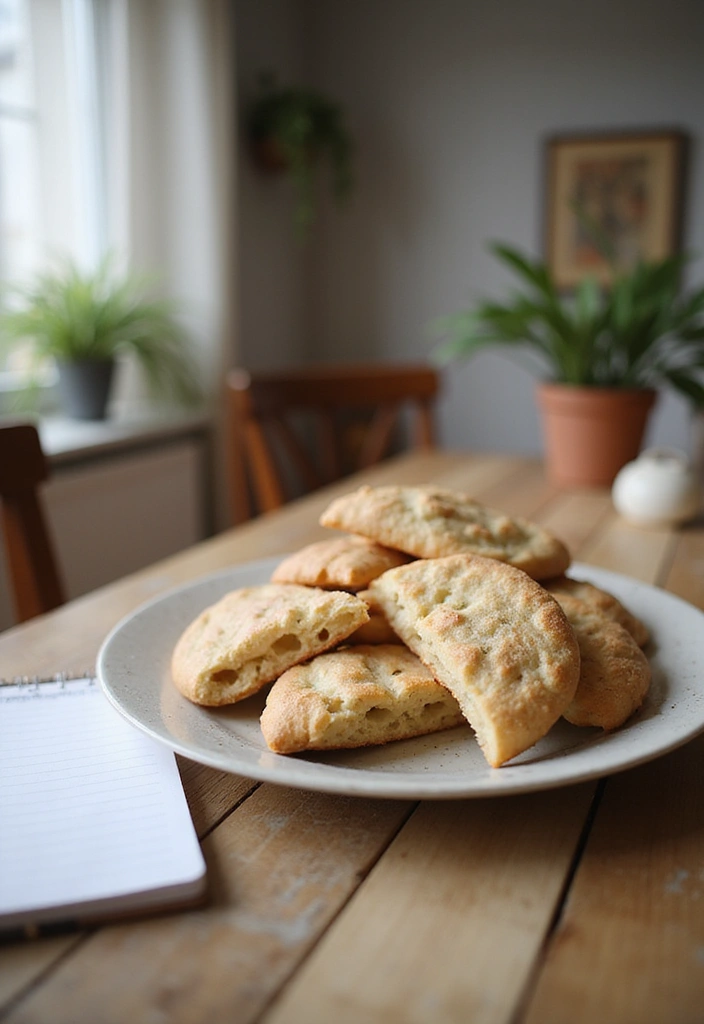
The aroma of freshly baked pita bread wafting through your kitchen is simply irresistible! This whole wheat pita bread recipe wraps flavors in the fluffiest, softest pockets you can imagine.
Packed with nutritional goodness, these homemade pita pockets offer a wholesome alternative to store-bought versions. Perfect for stuffing with your favorite fillings or enjoying warm with a side of hummus, this recipe is sure to impress your family and friends!
Before you know it, you’ll be mastering the art of pita making with this easy-to-follow guide, transforming simple ingredients into delightful, airy pockets that are bursting with flavor.
Recipe Overview

This healthy whole wheat pita bread recipe is both delicious and easy to make. With a prep time of just 10 minutes, cook time of 15 minutes, and a total time of 25 minutes, it’s a quick option for any meal.
To get started, you’ll need high-quality ingredients like Gold Medal premium quality all natural whole wheat flour, which not only enhances the flavor of your pitas but also boosts their nutritional value, making them a healthier choice compared to white bread.
Servings: Makes about 8 pitas.
Prep Time: 10 minutes.
Cook Time: 15 minutes.
Total Time: 25 minutes.
Calories: Approximately 140 calories per pita.
Enjoy the softness and fluffiness of these pitas, perfect for wraps or sandwiches. To achieve the best results while baking, consider using a pita bread baking stone. This durable cordierite cooking stone is ideal for ensuring your pitas puff up perfectly in the oven, giving them that delightful texture we all love.
In just 25 minutes, you can whip up 8 fluffy whole wheat pitas, each with about 140 calories! Perfect for wraps or sandwiches, these homemade pockets are a delicious and healthy addition to any meal.
Nutritional Information
Understanding the nutritional breakdown of your homemade pita bread is crucial for health-conscious bakers. Each whole wheat pita is packed with fiber and essential nutrients, making it a smart addition to any diet.
On average, one pita contains:
– Calories: 140
– Protein: 5g
– Carbohydrates: 30g
– Fat: 1g
– Fiber: 5g
– Sugar: 0g
By using whole wheat flour, you not only increase the fiber content but also enhance the vitamin and mineral profile. For this, consider using Gold Medal Premium Quality All Natural Whole Wheat Flour. This high-quality flour ensures that your pitas are not just delicious but also a nourishing choice for sandwiches or as a side with dips.
Additionally, measuring your ingredients accurately can significantly improve your baking results. A digital kitchen scale makes it easy to weigh your flour and other components, ensuring that you get the perfect dough consistency every time. Precise measurements contribute to the soft and puffy texture you desire in your homemade pitas.
Nourish your body with every bite! Each whole wheat pita is a powerhouse of fiber and nutrients, making it not just a delicious treat, but a smart choice for a healthy lifestyle.


Ingredients List
To whip up your own delightful whole wheat pita bread, gather the following ingredients:
– 2 cups whole wheat flour (like Gold Medal Premium Quality All Natural Whole Wheat Flour, 5 lb)
– 1 cup warm water (about 110°F)
– 2 teaspoons active dry yeast (such as Red Star Active Dry Yeast, 2 Pound Pouch)
– 1 teaspoon salt
– 1 tablespoon olive oil (optional)
– 1 teaspoon sugar (to activate the yeast)
These simple ingredients come together to create a dough that transforms into soft, fluffy pitas, allowing for endless stuffing options. Using high-quality whole wheat flour, like Gold Medal, ensures the best flavor and nutrition in your homemade bread. Additionally, incorporating quality active dry yeast, such as Red Star, helps activate the dough and promotes a perfect rise, resulting in those irresistible puffy pockets. Say goodbye to store-bought and hello to homemade goodness!


Step-by-Step Instructions

Creating your own pita bread is a rewarding experience! Here’s how to do it:
1. In a bowl, combine warm water, sugar, and yeast. Let it sit for 5-10 minutes until frothy.
2. In a large mixing bowl, combine whole wheat flour and salt. Make a well in the center and add the yeast mixture and olive oil.
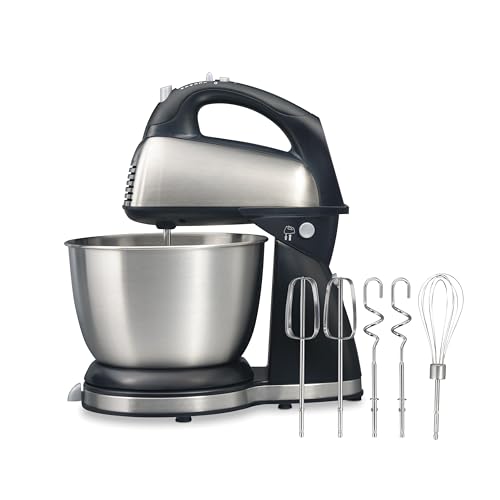
3. Mix until a dough begins to form, then knead on a floured surface for about 8-10 minutes until smooth. A great tool for this is the stand mixer, which makes kneading easier and more efficient.
4. Place the dough in a greased bowl, cover it, and let it rise in a warm place for 1 hour or until doubled in size.
5. Preheat your oven to 475°F (245°C) with a baking stone or an inverted baking sheet inside to ensure even heat distribution while baking.
6. Punch down the dough, divide it into 8 equal pieces, and roll each into a ball.
7. Roll each ball out into a circle about 1/4 inch thick using a rolling pin for a smooth finish.
8. Bake for 5-7 minutes or until puffs up and lightly browned.
Let the pitas cool slightly before serving. They are best enjoyed warm!
Homemade pita bread is more than a recipe; it’s a journey! With just warm water, whole wheat flour, and a bit of patience, you can create fluffy pockets that elevate any meal. Dive into the magic of baking!
You might also like


Pita Bread Tips

For the fluffiest, most delicious pita bread, remember these helpful tips:
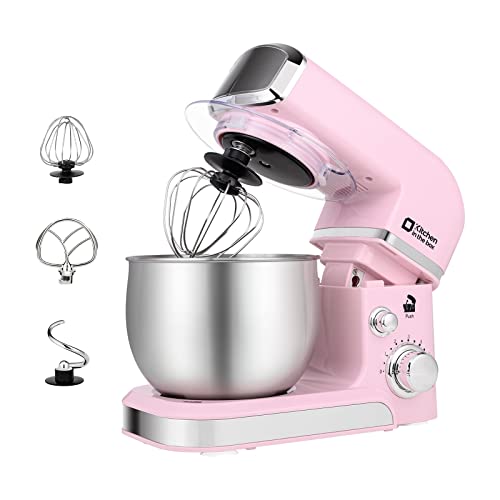
– **Use Warm Water**: Activate the yeast properly by using water that is warm, but not too hot. A stand mixer, like the Stand Mixer with Dough Hook, can help you mix the ingredients evenly while ensuring the water reaches just the right temperature for optimal yeast activation.
– **Knead Well**: Kneading develops the gluten, which helps create those lovely pockets. Don’t rush this step! With the dough hook attachment on the stand mixer, you can achieve the perfect kneading consistency without straining your hands.
– **High Heat**: Baking at a high temperature is essential to get the puff needed for perfect pockets. Consider using a baking stone, such as the Baking Stone. This heavy-duty cordierite stone retains heat exceptionally well, ensuring an even bake that promotes that desirable puff in your pita.
– **Store Properly**: If you have leftovers, store them in a sealed bag to keep them soft. You can also freeze them for future use.
With these tips and the right tools, you can ensure every pita is soft and perfect!


Frequently Asked Questions
Here are some common questions about making pita bread:
– Why is my pita bread not puffing up? This can happen if the oven is not hot enough or if the dough hasn’t been kneaded properly. To ensure optimal baking conditions, consider investing in a bread baking stone. It helps maintain a consistent temperature, allowing your pita to puff beautifully.
– Can I use all-purpose flour instead of whole wheat? Yes, but the flavor and texture will differ. For a healthier option, whole wheat is the way to go!
– How do I store leftover pita bread? Allow it to cool, then store in a sealed bag or container in the fridge for up to a week, or freeze for longer. If you need a reliable way to prepare your dough, a stand mixer with dough hook can make mixing and kneading easier, yielding a perfect dough every time.
– Can I make pita bread in advance? Yes, you can prepare the dough and let it rise, then refrigerate it overnight before rolling and baking. If you’re also looking for the right equipment to bake your pita bread, a pita bread baking pan can be useful for ensuring even baking.
These FAQs address common concerns and help troubleshoot any issues, ensuring your pita is perfect every time.

Serving Suggestions

Once your pitas are ready, the fun really begins! Here are some delicious serving ideas:
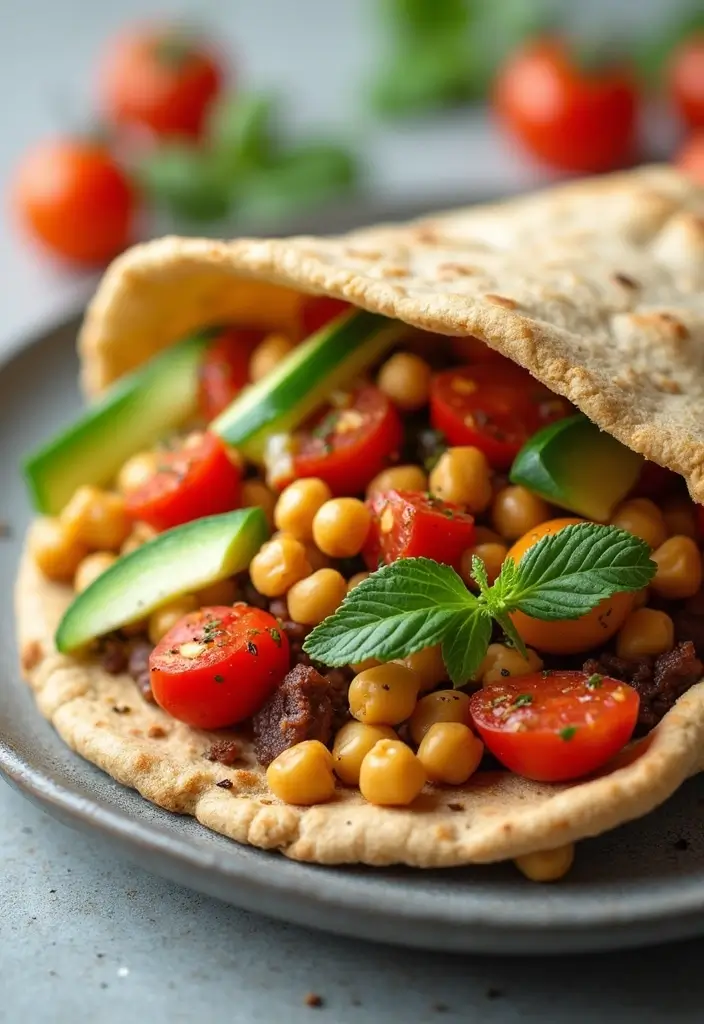
– Stuffed with falafel: Fill your pitas with crispy falafel, fresh veggies, and tahini sauce for a satisfying meal. To make it even easier, consider using Falafel Mix, which is a convenient way to whip up this flavorful filling.
– Greek salad pita: Combine diced cucumbers, tomatoes, red onions, olives, and feta cheese for a refreshing salad in a pocket. This light dish pairs beautifully with the pita’s soft texture.
– Breakfast pita: Scramble some eggs with spinach and cheese for a great start to your day! A perfect way to fill your pitas with protein and greens.
– Veggie and hummus: Spread a generous layer of hummus and layer it with raw veggies for a healthy snack. If you’re looking to make your hummus from scratch, a handy hummus maker can help you achieve the perfect creamy consistency.
To ensure your pitas come out perfectly puffed every time, investing in a pita bread baking stone can make a significant difference. This stone helps distribute heat evenly, resulting in those delightful pockets that are perfect for stuffing.
These serving ideas, along with the suggested products, make your homemade pita versatile and enjoyable, perfect for any occasion.
Conclusion

Baking your own whole wheat pita bread is not only a fun and rewarding experience, but it also brings a healthier option to your meals. With its soft, puffy texture, you can fill it with whatever you like!
Try this recipe out and share your creations with friends and family. Happy baking!
Note: We aim to provide accurate product links, but some may occasionally expire or become unavailable. If this happens, please search directly on Amazon for the product or a suitable alternative.
This post contains Amazon affiliate links, meaning I may earn a small commission if you purchase through my links, at no extra cost to you.
Frequently Asked Questions
What Makes This Pita Bread Recipe Healthier Than Store-Bought Options?
This whole wheat pita bread recipe is a healthier alternative to store-bought options because it uses whole wheat flour, which is rich in fiber and essential nutrients. Homemade pita bread also allows you to control the ingredients, avoiding additives and preservatives found in many packaged breads.
Plus, the satisfaction of making your own pitas means they’re fresher and more flavorful!
How Can I Ensure My Pita Bread Puffs Up Perfectly?
To achieve those soft, fluffy pita pockets, make sure your oven is preheated to a high temperature (around 475°F or 245°C). Also, use warm water to activate the yeast properly, and knead the dough well to develop gluten. If your pitas don’t puff up, they might need a little more time in the oven or the dough might have been too thick.
Don’t worry! Each attempt is a learning experience!
Can I Substitute Whole Wheat Flour with Other Types of Flour?
Absolutely! While this recipe focuses on whole wheat flour for its health benefits, you can experiment with other flours like all-purpose flour or spelt flour. Just keep in mind that the texture and nutritional content may vary. If you use all-purpose flour, you might find the pitas are a bit lighter but won’t have the same health benefits as whole wheat.
Feel free to mix different flours too for a unique flavor!
What Are Some Creative Ways to Serve Homemade Pita Bread?
The possibilities are endless! You can stuff your homemade pita bread with falafel, grilled vegetables, or chicken shawarma for a tasty meal. For a lighter option, fill them with hummus, fresh veggies, and herbs. You can even turn them into mini pizzas! Just add your favorite toppings and bake until crispy.
Don’t forget to dip them in sauces like tzatziki or tahini for an extra flavor boost!
How Should I Store Leftover Pita Bread to Keep It Fresh?
To keep your pita bread fresh, let it cool completely before storing. Wrap them in a clean kitchen towel and place them in a zip-top bag or airtight container. They’ll stay fresh at room temperature for a couple of days. For longer storage, freeze them! Just layer parchment paper between each pita and pop them in the freezer. When you’re ready to enjoy, simply thaw and warm them in the oven or on a skillet.
Your homemade pitas will taste just as delicious!