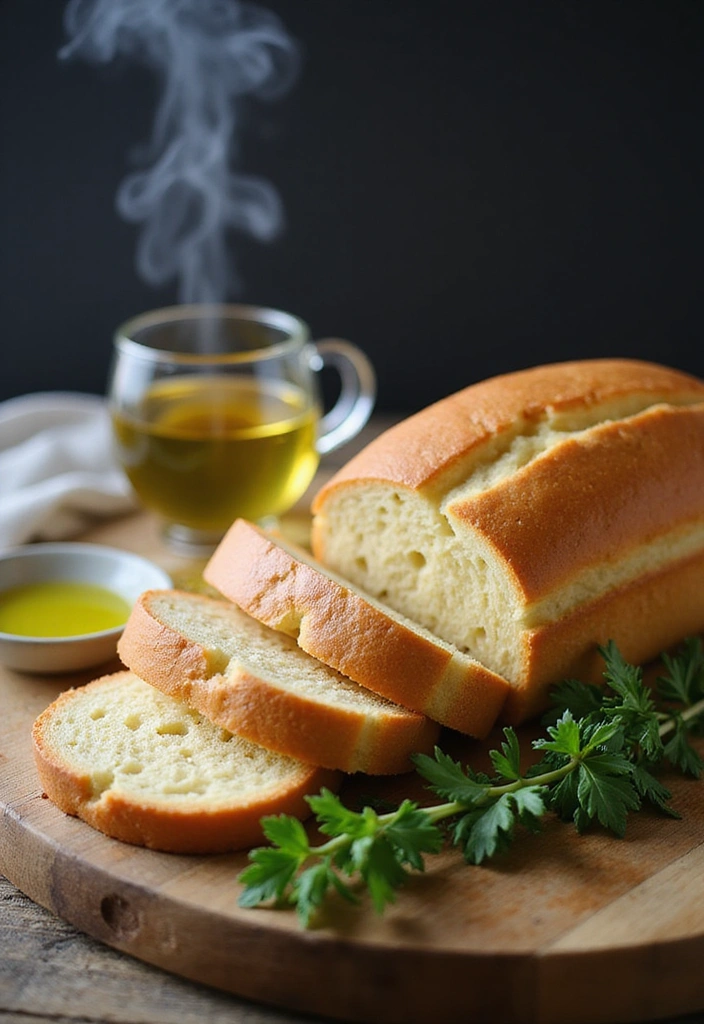
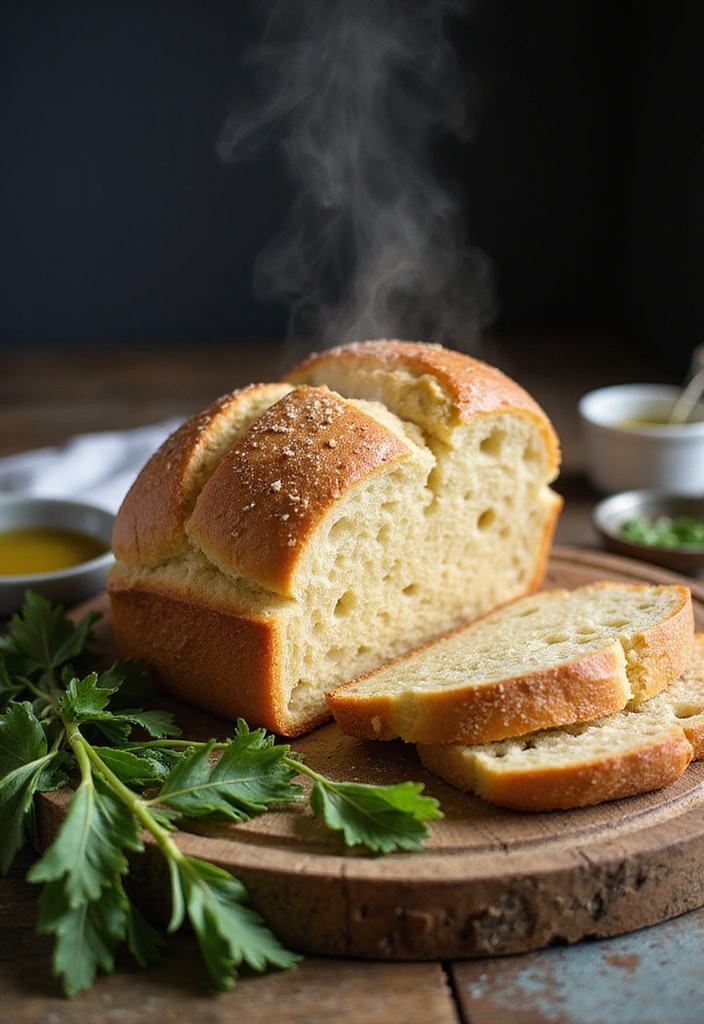
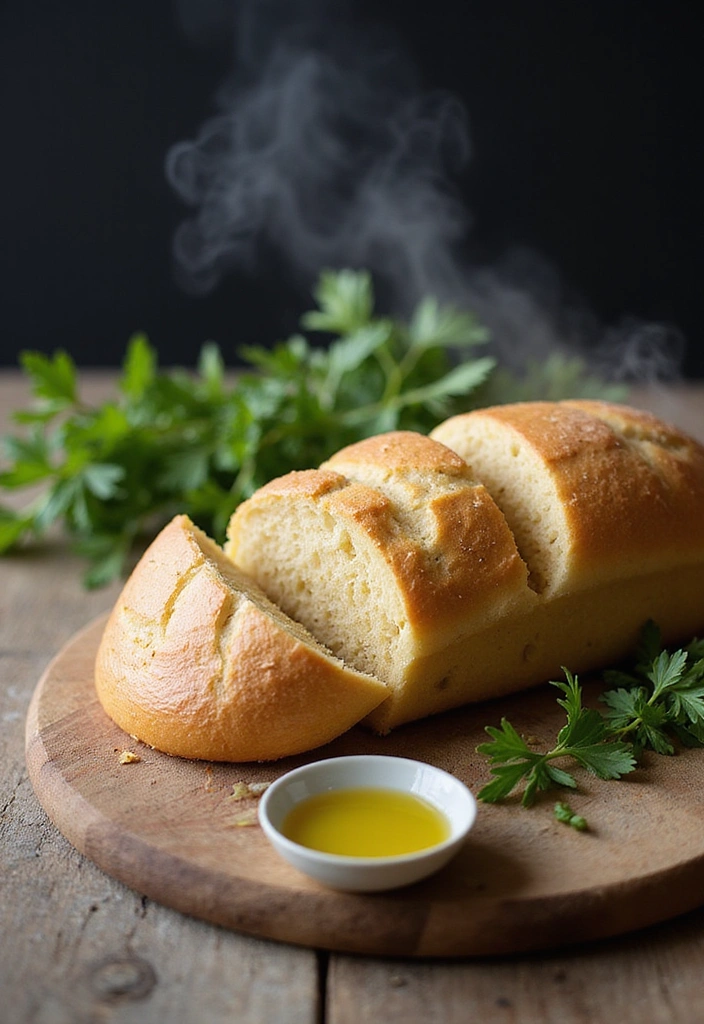
Say goodbye to dense gluten-free bread and hello to soft, fluffy goodness!
This gluten-free bread recipe is a game-changer for those craving fresh, homemade bread without the gluten hassle. With minimal effort and simple ingredients, you can create a loaf that will make your kitchen smell heavenly. Whether you’re new to gluten-free baking or a seasoned pro, this easy recipe will impress your taste buds and keep your family coming back for more.
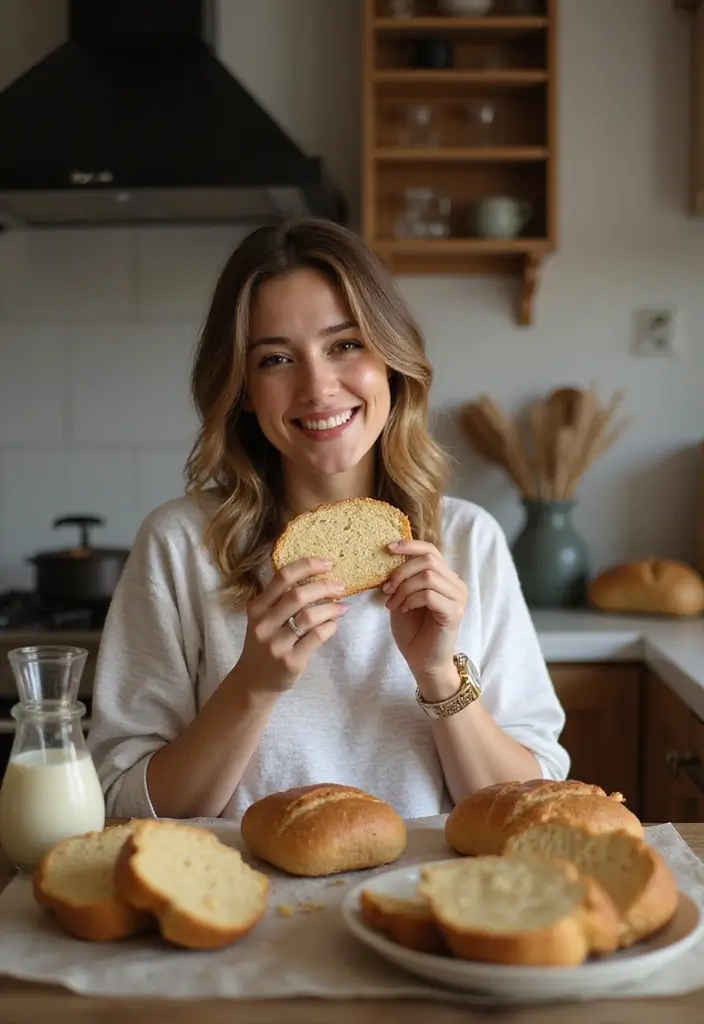
Get ready to slice into a warm, tender loaf that pairs perfectly with your favorite spreads or sandwiches. Each bite is a delightful experience, and you’ll find yourself reaching for seconds!
If you’ve been searching for healthy bread alternatives that prioritize taste and texture, look no further. Let’s embark on this baking adventure together!
What Makes This Bread So Good?

This gluten-free bread recipe stands out because it blends a mix of flours to mimic the texture of traditional bread. The combination of almond flour, coconut flour, and tapioca flour gives it that soft, airy feel we all love.
The secret ingredient making all the difference? Psyllium husk powder! It binds with water to create the perfect elasticity, ensuring your loaf doesn’t crumble. Plus, it’s packed with fiber, making it a healthy choice for your daily bread fix.
Not only is this recipe gluten-free, but it’s also adaptable! Wish to add seeds, nuts, or dried fruits? Go for it! This bread is your blank canvas. Each slice is not just filling but also keeps you satisfied longer. With so many benefits, you’ll want to make this a staple in your kitchen.
Join the gluten-free baking revolution and enjoy each bite with confidence knowing it’s healthy and delicious!
Recommended Products

Versatile Replacement: This gluten free flour 1 to 1 substitute for wheat flour can be used in yeasted recipes, allowing you to create delicious GF versions of artisan boules, bagels, cinnamon rolls, and burger buns with ease.

Mix makes up to 24 chocolate chip cookies

HOMEMADE PERFECTION, EVERY TIME: Bob’s Red Mill Gluten Free Homemade Wonderful Bread Mix bakes a 1 ½-lb loaf of tender, flavorful bread perfect for sandwiches, rolls, and sharing


Recipe Overview

Before diving into the process, here’s a quick recipe overview:
– Servings: 12 slices
– Prep Time: 10 minutes
– Cook Time: 50 minutes
– Total Time: 1 hour
– Calories: Approximately 120 calories per slice.
This great balance of prep and cook time means you won’t be stuck in the kitchen all day. Spend just 10 minutes getting your ingredients together, then let the oven do the hard work. To make the process even easier, consider using a digital kitchen scale to measure your ingredients accurately. It’s simple to use and ensures you have the right quantities for perfect bread every time.
When it comes to your flour, the King Arthur Measure for Measure gluten-free flour is an excellent all-purpose option. This 1:1 substitute for wheat flour makes it easy to achieve that soft and fluffy texture you desire without the gluten. Plus, it’s non-GMO and kosher certified, making it a wholesome choice.
Lastly, a sturdy baking vessel like the bread loaf pan is essential for crafting your loaf. With its nonstick carbon steel design, it helps your bread release easily and bake evenly, allowing you to enjoy your homemade creation hassle-free.
Ideal for busy weekdays or those lazy weekend mornings, this bread fits perfectly into any schedule. The best part? You get to enjoy fresh bread that you know exactly what went into it. Say no to preservatives and hello to wholesome ingredients!
Recommended Products

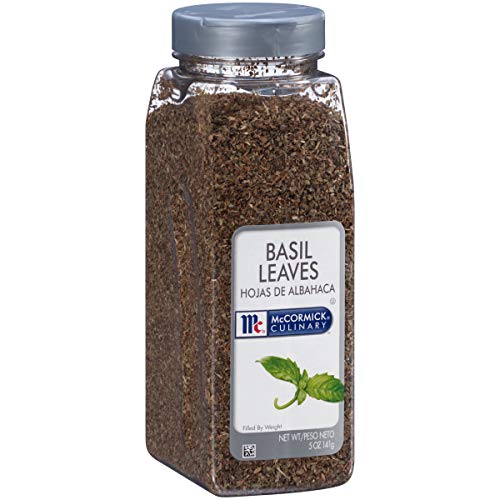
ORGANIC PSYLLIUM HUSK POWDER FOR BAKING BREAD: Kate Naturals Organic Psyllium Husk Powder is certified USDA organic, gluten-free and keto-friendly. Our natural psyllium powder is pure and free from addititives and preservatives. Kate Naturals psyllium husk for baking is an excellent choice for those seeking an organic fiber powder.

ORGANIC PSYLLIUM HUSK POWDER FOR BAKING BREAD: Kate Naturals Organic Psyllium Husk Powder is certified USDA organic, gluten-free and keto-friendly. Our natural psyllium powder is pure and free from addititives and preservatives. Kate Naturals psyllium husk powder is an excellent choice for those seeking an organic fiber powder.

EXCELLENT SOURCE OF FIBER: Soluble fiber from foods such as psyllium seed husks, as part of a diet low in saturated fat and cholesterol, may reduce the risk of heart disease
Nutritional Information

Dietary needs vary, and this gluten-free bread recipe caters to many!
Let’s break down the nutritional values per slice:
– Calories: 120
– Carbohydrates: 12g
– Protein: 4g
– Fat: 7g
– Fiber: 3g
– Sugar: 0g
This bread not only avoids gluten but also packs in healthy fats and protein, making it a smart choice for maintaining energy throughout the day. Fiber helps with digestion and keeps you feeling full longer. It’s a great addition to any meal or snack.
To make your gluten-free bread-making experience even better, consider using King Arthur Measure for Measure Gluten-Free Flour. This all-purpose 1:1 substitute for wheat flour ensures that your bread has the perfect texture and flavor, making baking enjoyable and accessible.
For those who want to take the hassle out of the process, a bread machine can be a game changer. The OSIPOTO bread maker has beginner-friendly controls and a 15-hour timer, allowing you to prepare your dough with ease while enjoying the delightful aroma of fresh bread filling your home.
You can enjoy it guilt-free, knowing you’re nourishing your body while indulging in that satisfying bread experience. Perfect for breakfast, lunch, or as a savory side!
Nourish your body with every slice! This gluten-free bread packs 4g of protein and 3g of fiber, keeping you energized and satisfied all day long. Enjoy a guilt-free slice of happiness!
Recommended Products

✔️ FRESH & FLAVORFUL ORGANIC FLOUR – Gently milled from some of the freshest organic coconuts, our coconut flour is the perfect substitute for white or grain flours. Unbleached and unrefined, with a mildly sweet, rich flavor to your favorite recipes


GOOD INGREDIENTS FOR ALL: Bob’s Red Mill Organic Coconut Flour is a naturally gluten free flour, perfect for grain-free baking and cooking; an excellent source of fiber, this flour is ideal for those following low-carb, paleo or keto lifestyles


Ingredients List
Let’s gather the essentials! Here’s what you need for this amazing gluten-free bread:
– 2 cups almond flour
– 1/2 cup coconut flour
– 1/2 cup tapioca flour
– 1/4 cup psyllium husk
– 1 tablespoon baking powder
– 1 teaspoon salt
– 4 large eggs
– 1 ½ cups warm water
– 2 tablespoons olive oil
These ingredients work together to create that fluffy texture and rich flavor. The almond flour provides a nutty taste and moistness, while the coconut flour adds a subtle sweetness and helps absorb moisture, ensuring your bread remains fluffy. The inclusion of psyllium husk is crucial as it acts as a binding agent, giving your bread that desirable structure without gluten.
Whether you have a well-stocked pantry or need to grab a few items, they’re all reasonably accessible. Plus, knowing you’re using wholesome ingredients gives you peace of mind as you enjoy your delightful bread!
Gathering the right ingredients is the first step to baking success! With just a few simple staples, you can whip up a gluten-free bread that’s soft, fluffy, and bursting with flavor.


Step-by-Step Instructions

Time to roll up your sleeves! Follow these easy steps to bake your gluten-free bread:
1. Preheat your oven to 375°F (190°C) and grease a 9×5-inch loaf pan. A great option is the GoodCook set of 2 medium 8″ x 4″ nonstick steel bread loaf pans, which ensures easy release and cleanup.
2. In a large bowl, mix together the almond flour, coconut flour, tapioca flour, psyllium husk, baking powder, and salt until well combined. For the almond flour, you can use Blue Diamond Almonds almond flour, which is finely sifted and gluten-free, making it perfect for this recipe.
3. In another bowl, whisk the eggs, olive oil, and warm water until frothy.
4. Gradually add the wet mixture to the dry ingredients, stirring to combine.
5. Let the mixture sit for about 10 minutes; this allows the psyllium husk to absorb moisture, helping your bread rise. You can find high-quality psyllium husk in psyllium husk powder, which is non-GMO and a great source of soluble fiber.
6. Pour the batter into the prepared loaf pan, smoothing the top.
7. Bake in the preheated oven for 50-60 minutes, or until the top is golden and a toothpick comes out clean.
8. Allow the bread to cool in the pan for 10 minutes before transferring it to a wire rack to cool completely.
9. Slice and enjoy your homemade gluten-free bread!
Each step is straightforward and guarantees fantastic results. Enjoy the process and get ready for that mouthwatering aroma wafting through your home!


Tips for Success
Want to ensure your gluten-free bread turns out perfectly? Here are some handy tips:
– Measure accurately: Use a digital kitchen scale for the best results; weighing flour can prevent discrepancies in density.
– Let the dough rest: Allowing the mixture to sit gives the psyllium husk time to work its magic; don’t skip this step! Incorporate psyllium husk powder for improved texture and moisture retention.
– Try a water bath: Place a small dish of water in the oven to create steam, helping your bread rise beautifully.
– Experiment with flavor: Add herbs, spices, or seeds to personalize your loaf. Rosemary and garlic or sunflower seeds can add a delightful twist.
– Store correctly: Keep your bread in an airtight container, and if you want to keep it fresh longer, slice and freeze some for later.
These tips will help elevate your baking game, making your gluten-free bread a consistent winner in your kitchen!


Frequently Asked Questions
Got questions? Here are some common queries answered:
– Can I substitute the flours?: While it’s best to stick to the suggested flours for texture, you can experiment with different gluten-free options, like oat flour or buckwheat flour. Just keep in mind it may affect the end result.
– How do I store leftovers?: Once cool, store your bread in an airtight container at room temperature for up to three days or freeze for long-term storage.
– Can I add yeast for a fluffier loaf?: Yes! Adding active dry yeast will give a more traditional bread feel, but you’ll need to adjust the wet ingredients slightly. This ingredient helps your bread rise better, enhancing that soft, fluffy texture you’re aiming for.
– What if my bread doesn’t rise?: Always check the freshness of your baking powder and ensure your psyllium husk is fresh. Incorporating psyllium husk powder is crucial, as it provides structure and moisture to gluten-free dough, which can help achieve that fluffy texture.
This FAQ section clears up common concerns, ensuring you feel confident as you bake your gluten-free bread!
Experimenting with your gluten-free bread recipe can lead to delicious surprises! Just remember, while substitutions can work, sticking to the suggested flours gives you that soft, fluffy texture we all crave.
Enjoying Your Bread

The moment of joy arrives—slicing into your freshly baked gluten-free bread! This bread is perfect for all kinds of meals. Toast it and slather on your favorite jam for breakfast, or make a hearty sandwich piled high with delicious fillings for lunch. You can even enjoy it as a side with soups and salads. The options are endless!
Looking to elevate your serving game? You might find it helpful to use a bread slicing guide to achieve perfectly even slices, which makes for a beautiful presentation and ensures each piece is just the right thickness for toasting or sandwiches.
For a tasty twist, try pairing slices with avocado and a sprinkle of salt. An avocado slicer can make this process quick and easy, allowing you to create perfectly sliced avocado in no time. You could also make mini bruschetta topped with tomatoes and basil.
Sharing is caring, so don’t forget to pass on your baking success to friends and family. They’ll appreciate a taste of your homemade creation, and you’ll inspire others to indulge in the world of gluten-free baking. If you need a convenient way to mix your ingredients, consider trying Bob’s Red Mill gluten free homemade wonderful bread mix. Enjoy every bite and the compliments that come your way!


Conclusion
Baking your own gluten-free bread is not just rewarding, it’s delicious!
With this simple recipe, you can enjoy soft, fluffy bread that suits all tastes. Embrace the journey of gluten-free baking and enjoy the satisfaction of homemade goodness that your family will love. Don’t hesitate to experiment and make it your own—happy baking!
Note: We aim to provide accurate product links, but some may occasionally expire or become unavailable. If this happens, please search directly on Amazon for the product or a suitable alternative.
This post contains Amazon affiliate links, meaning I may earn a small commission if you purchase through my links, at no extra cost to you.
Frequently Asked Questions
What are the best gluten-free flours to use for this bread recipe?
In this gluten-free bread recipe, we use a blend of almond flour and other gluten-free flours to achieve that soft, fluffy texture you crave. While almond flour is a star ingredient, you can also experiment with coconut flour or rice flour for different flavors and textures. Just remember, the right balance is key for achieving that perfect loaf!
How can I store homemade gluten-free bread to keep it fresh?
To keep your homemade gluten-free bread fresh, let it cool completely before storing it in an airtight container. You can keep it at room temperature for up to three days. For longer storage, slice the bread and freeze it! Just wrap individual slices in plastic wrap, place them in a freezer bag, and you’ll have soft bread ready to toast anytime you want!
Can I add ingredients like seeds or herbs to this gluten-free bread recipe?
Absolutely! Adding seeds like sunflower or chia, or herbs like rosemary or thyme can enhance the flavor and nutrition of your gluten-free bread. Just make sure not to overload the dough, as it might affect the bread’s structure. Start with a tablespoon or two and see how you like it!
What should I do if my gluten-free bread turns out too dense?
If your gluten-free bread turns out dense, it could be due to a few factors, such as not measuring your flours accurately or not enough leavening agent. Next time, ensure you measure your ingredients carefully and consider adding a bit more baking powder or even a splash of vinegar to help with rising. Experimenting with the moisture in your dough can also help achieve that light, fluffy texture!
Is this gluten-free bread recipe suitable for those with nut allergies?
If you have nut allergies, no worries! You can still enjoy homemade gluten-free bread by substituting almond flour with oat flour or a gluten-free all-purpose flour blend that doesn’t contain nuts. Just make sure to check the labels for any potential cross-contamination. With a few adjustments, you can create a delicious loaf that fits your dietary needs!